vue(vite)+electron项目创建、打包、配置路由
安装依赖
先创建构建环境,安装依赖
1
2
3
4
5
6
7
| npm createnpm create vite@latest vue-electron-app --template vue
cd vue-electron-app
npm install
npm install electron electron-builder --save-dev
npm install concurrently --save-dev
npm install vite-plugin-electron --save-dev
npm install @vitejs/plugin-vue --save-dev
|
利用vite构建vue项目
安装依赖
安装electron
安装开发依赖
安装热加载插件
由于网络问题可能导致安装不全,根据报错再自行补充安装
目录结构
此时项目主要目录结构为
1
2
3
4
5
6
7
8
9
10
11
| vue-electron-app/
├── src/
| ├── assets/
| ├── components/
| ├── main.js
| ├── App.vue
| ├── style.css
├── public/
├── vite.config.js
├── index.html
└── package.json
|
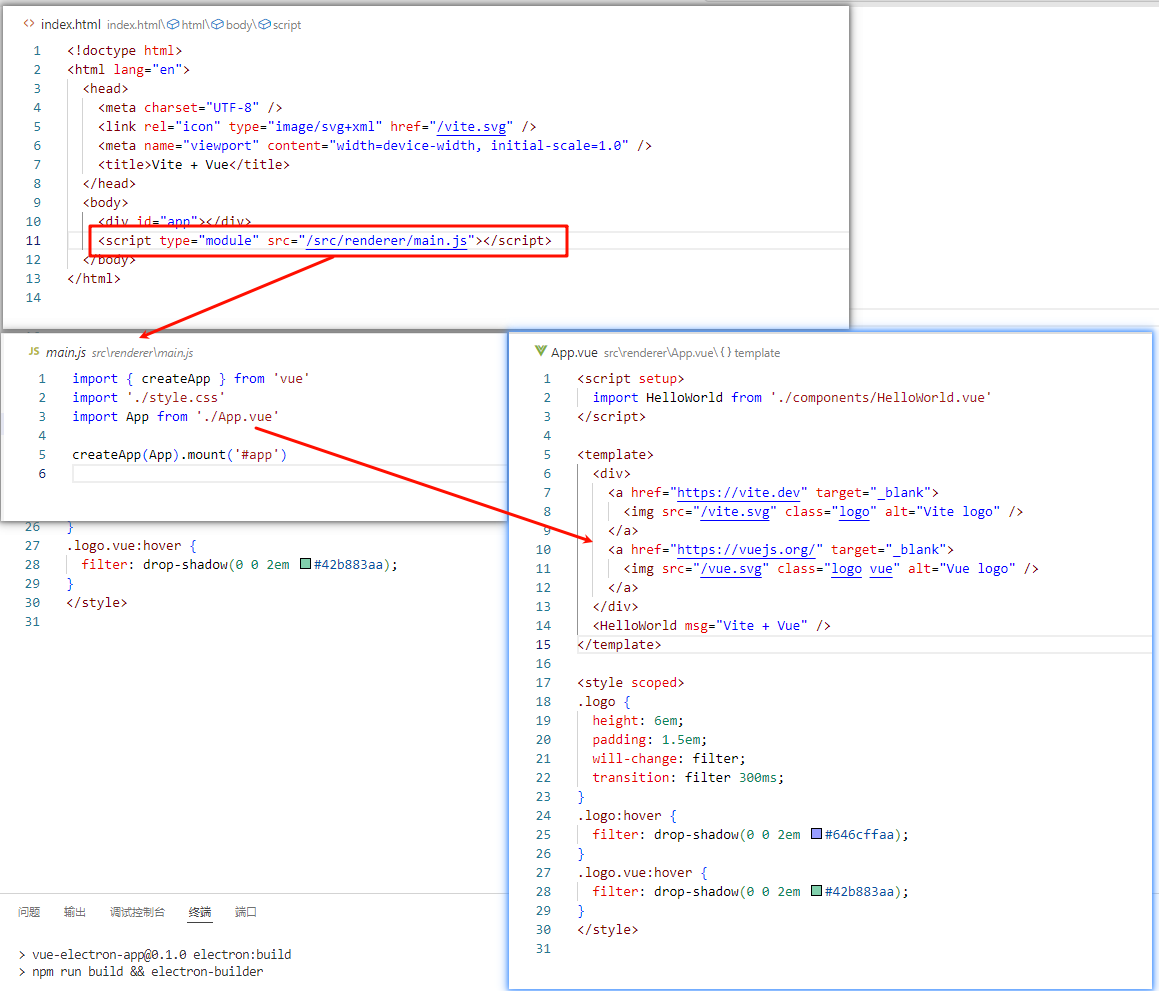
这个目录结构就是vue项目的目录,简单介绍一下,vue调试的时候会先读取根目录下的index.html文件,html文件中指示了main.js函数的位置,在main函数中加载App.vue
用户在App.vue中配置路由,引用其他页面即可
加入electron为了结构清晰一点,我稍微更改了一下目录结构,因为electron需要先读取他的main.js文件
1
2
3
4
5
6
7
8
9
10
11
12
13
| vue-electron-app/
├── src/
| ├── main/ // (自行创建)
│ └── main.js
│ ├── components/
│ ├── pages/
│ ├── App.vue
│ ├── main.js
│ ├── style.css
├── public/
├── vite.config.js
├── index.html
└── package.json
|
创建新入口main.js
在src目录下创建一个 main/main.js 文件
win.loadFile指向vue项目的index.html文件
1
2
3
4
5
6
7
8
9
10
11
12
13
14
15
16
17
18
19
20
21
22
23
24
25
26
|
const { app, BrowserWindow } = require('electron')
const path = require('path')
function createWindow() {
const win = new BrowserWindow({
width: 800,
height: 600,
webPreferences: {
nodeIntegration: true,
contextIsolation: false
},
})
if (process.env.NODE_ENV === 'development') {
win.loadURL('http://localhost:5173')
win.webContents.openDevTools()
} else {
win.loadFile(path.resolve(__dirname, '../../dist/index.html'));
}
}
app.whenReady().then(createWindow)
|
然后创建一个renderer文件夹,将conmponents目录、App.vue文件、main.js文件以及style.css挪进去。
1
2
3
4
5
6
7
8
|
import { createApp } from 'vue'
import './style.css'
import App from './App.vue'
createApp(App).mount('#app')
|
需要在package.json文件中,指向刚刚创建的入口函数main.js,后面build部分可以先不用管,定义好main的位置以及dev代表的指令,name和version随意
1
2
3
4
5
6
7
8
9
10
11
12
13
14
15
16
17
18
19
20
21
22
23
24
25
26
27
28
29
30
31
32
33
34
35
36
|
{
"name": "vue-electron-app",
"version": "0.1.0",
"main": "src/main/main.js",
"scripts": {
"dev": "vite",
"build": "vite build",
"serve": "vite preview",
"electron:build": "npm run build && electron-builder",
"electron:serve": "vite"
},
"devDependencies": {
"@vitejs/plugin-vue": "^5.2.1",
"concurrently": "^8.2.2",
"electron": "^28.0.0",
"electron-builder": "^24.9.1",
"vite": "^5.0.0",
"vite-plugin-electron": "^0.29.0"
},
"build": {
"appId": "com.example.vue-electron",
"productName": "VueElectronApp",
"directories": {
"output": "output"
},
"files": [
"dist/**/*",
"src/**/*"
],
"win": {
"target": "nsis",
"icon": null
}
}
}
|
更改vite.config.js
在 vite.config.js 中引入热加载插件,主要build部分可以不进行配置,只是运行的时候会在根目录下创建一个新文件夹 dist-electron 然后文件夹内有一个main.js文件,几乎和main/main.js一样,有点稍微破坏结构,这里配置是将这个文件夹生成的位置放到 node_modules 内,隐藏起来。
1
2
3
4
5
6
7
8
9
10
11
12
13
14
15
16
17
18
19
20
21
|
import { defineConfig } from 'vite'
import vue from '@vitejs/plugin-vue'
import electron from 'vite-plugin-electron'
export default defineConfig({
plugins: [
vue(),
electron({
entry: 'src/main/main.js',
vite: {
build: {
outDir: 'node_modules/.cache/vite-electron',
write: false
}
}
})
]
})
|
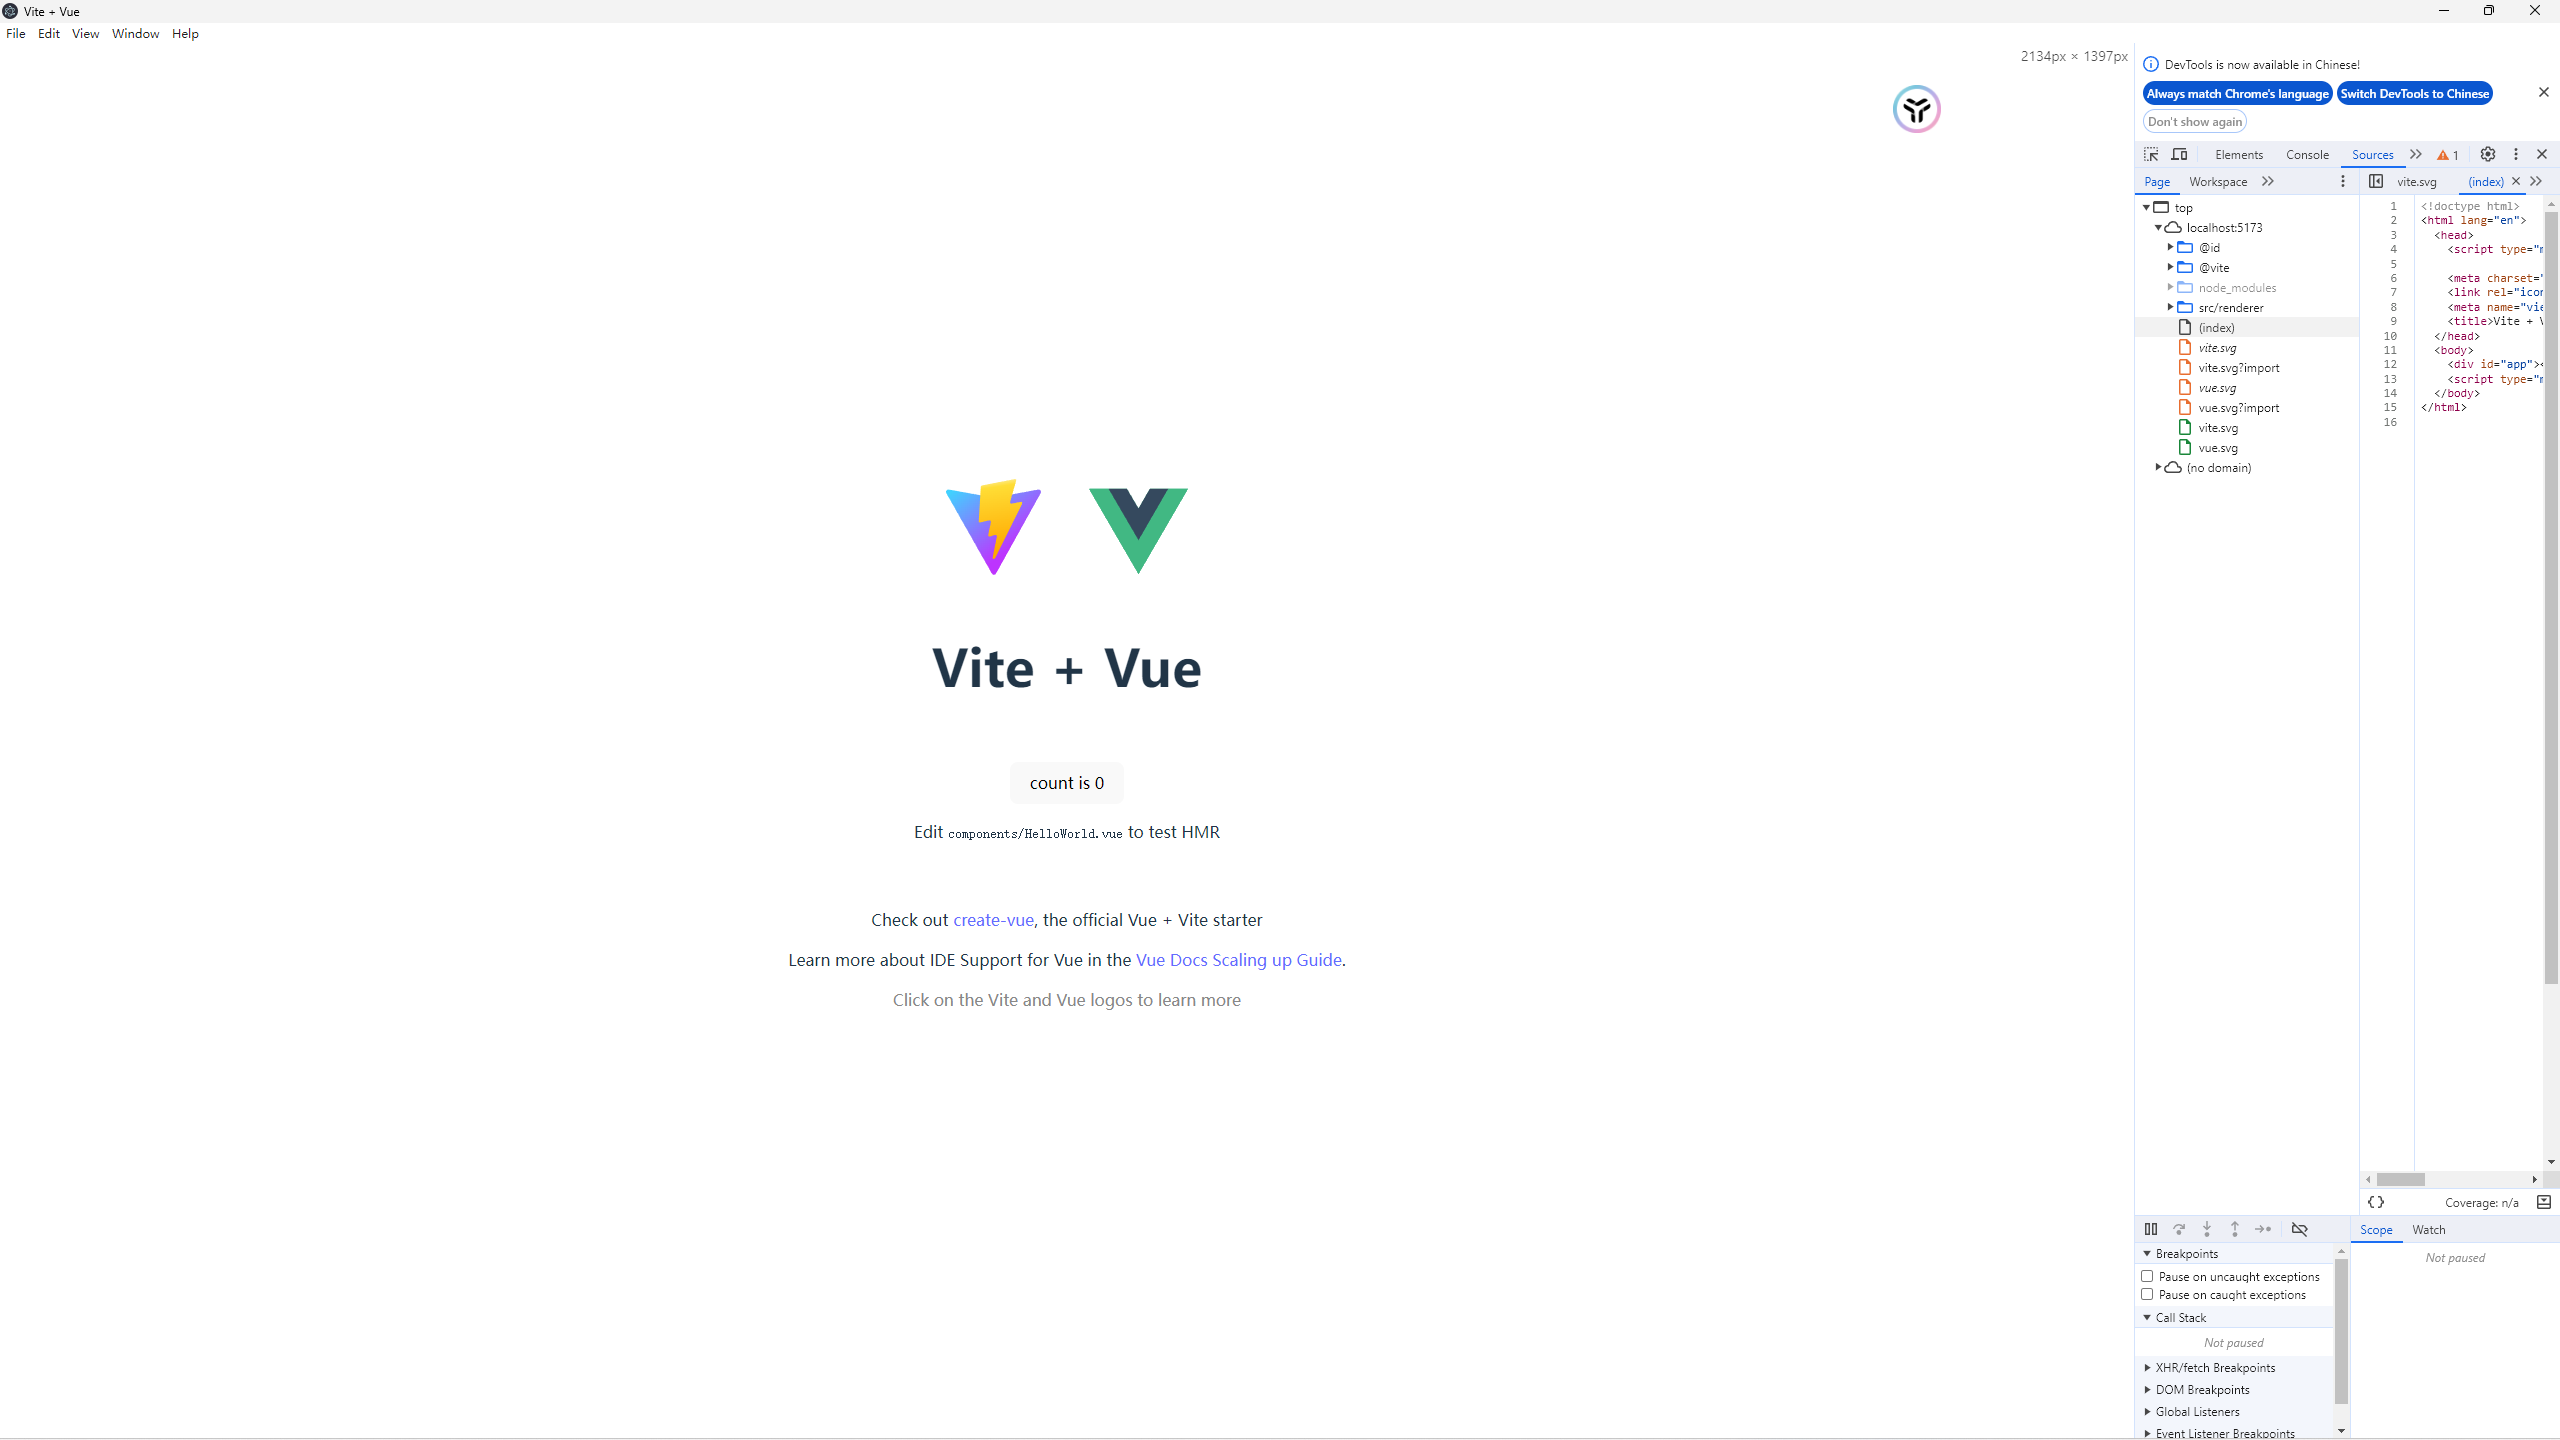
这个时候就可以运行了
打包
最后来看打包
在package.json中的build字段配置打包,指明名称以及打包到的目录之后就是重点了,files是要打包的内容,首先就是 dist目录,vue打包时会将资源文件copy一份放到dist目录下,直接打包dist目录即可,然后就是main/main.js,这个也要打包进去,然后就是刚封装的 vue的核心部分 renderer 目录下的vue文件。
1
2
3
4
5
6
7
8
9
10
11
12
13
14
15
16
|
"build": {
"appId": "com.example.vue-electron",
"productName": "VueElectronApp",
"directories": {
"output": "output"
},
"files": [
"dist/**/*",
"src/**/*"
],
"win": {
"target": "nsis",
"icon": null
}
}
|
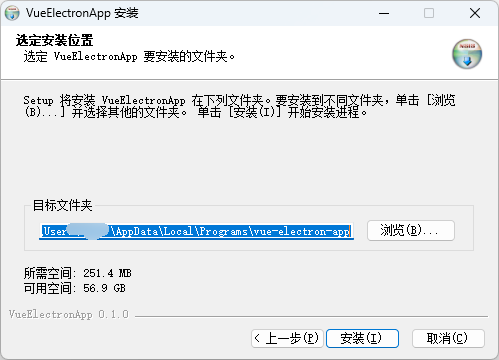
这个配置比较简单,这样打包出来的 setup exe 会双击运行直接自动安装到C盘,人都傻了。
一般会放在 user/AppDate/Local/Programs/ 目录下,目录名称就是上面productName设置的名称。
如果找不到用 every thing 搜一下就行。想要不直接安装,提高用户体验也可以,两个办法,
一、直接把便携版发过去,不给 setup版本(doge
二、添加安装向导,因为是Windows,
直接使用简单方便快捷好使的NSIS,https://www.electron.build/nsis 这个仅支持Windows
如果有更高级的需求可以使用Inno Setup:https://jrsoftware.org/isdl.php
NSIS
在build中继续增加
1
2
3
4
5
6
7
8
9
10
11
12
13
14
15
16
17
18
19
20
21
|
"build": {
"appId": "com.example.vue-electron",
"productName": "VueElectronApp",
"directories": {
"output": "output"
},
"files": [
"dist/**/*",
"src/**/*"
],
"win": {
"target": "nsis",
"icon": null
},
"nsis": {
"oneClick": false,
"allowElevation": true,
"allowToChangeInstallationDirectory": true
}
}
|
打包试一下

觉得有点丑,其实大部分都是这样的,如果想改还能设置图标什么的,自行研究吧。
注意点:
如果打包之后试运行没有出现页面,检查一下 main/main.js 文件
1
2
3
|
win.loadFile(path.resolve(__dirname, '../../dist/index.html'));
|
vue打包生成的index.html和根目录下的index.html是不一样的,直接引用了打包之后的文件,然后 script 标签消失,这个标签仅用于开发环境测试使用,打包之后消失时正常的
1
| <script type="module" src="/src/main.js"></script>
|
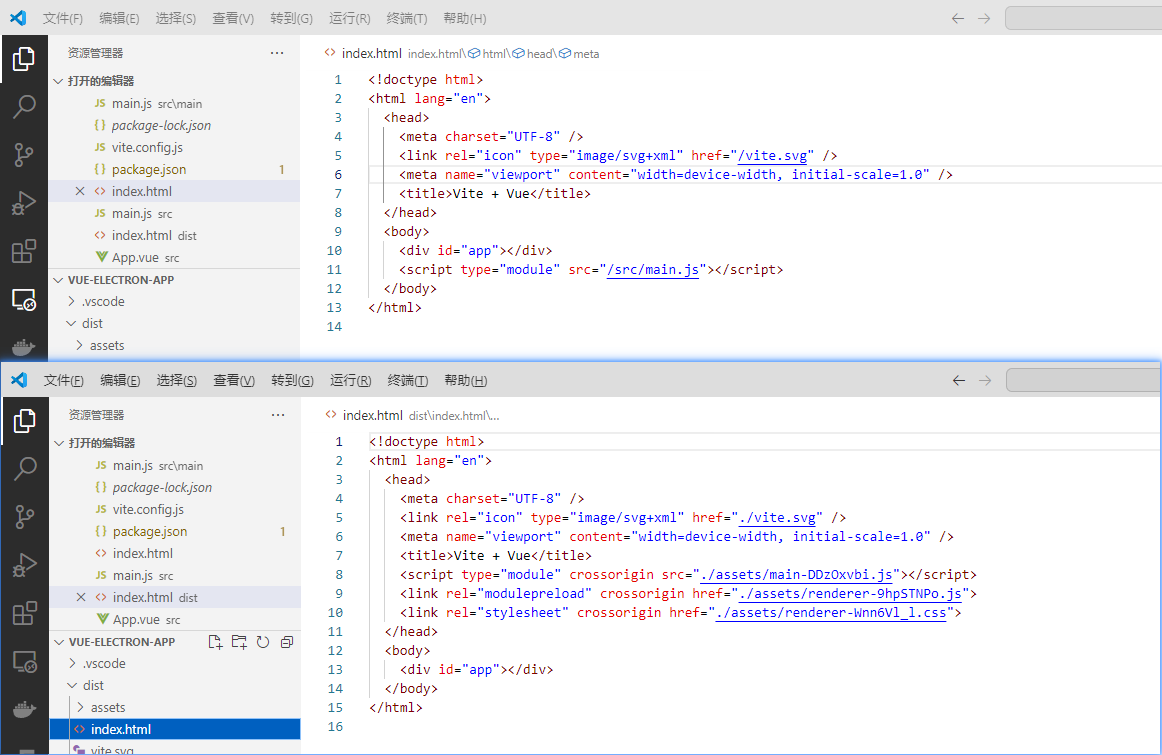
还要检查package.js中是否将代码打包进入了,不需要选资源文件,因为之前将代码都放在了src目录下,只需要将这个目录打包进入即可
1
2
3
4
5
6
7
8
9
10
11
12
13
14
15
16
17
18
19
20
21
22
23
24
25
26
27
28
29
30
31
32
33
34
35
36
37
38
39
40
41
| {
"name": "vue-electron-app",
"version": "0.1.0",
"main": "src/main/main.js",
"scripts": {
"dev": "vite",
"build": "vite build",
"serve": "vite preview",
"electron:build": "vite build && electron-builder",
"electron:serve": "vite"
},
"devDependencies": {
"@electron-forge/cli": "^7.7.0",
"@vitejs/plugin-vue": "^5.2.1",
"concurrently": "^8.2.2",
"electron": "^28.0.0",
"electron-builder": "^24.9.1",
"vite": "^5.0.0",
"vite-plugin-electron": "^0.29.0"
},
"build": {
"appId": "com.example.vue-electron",
"productName": "VueElectronApp",
"directories": {
"output": "output"
},
"files": [
"dist/**/*",
"src/**/*"
],
"win": {
"target": "nsis",
"icon": null
},
"nsis": {
"oneClick": false,
"allowElevation": true,
"allowToChangeInstallationDirectory": true
}
}
}
|
配置路由
确定打包没问题之后,再来进行路由的配置,在vue开发中还是比较依赖路由的
下载路由
按照开发规范先创建一个router文件夹,新建一个index文件
这里先配置三条路由,设置默认打开 home
1
2
3
4
5
6
7
8
9
10
11
12
13
14
15
16
17
18
19
20
21
22
23
24
25
| import { createRouter,createWebHistory } from "vue-router";
import Helloworld from "../components/HelloWorld.vue"
import demo from "../pages/demo.vue";
import indexs from "../pages/index.vue";
const router = createRouter({
history: createWebHistory(),
routes: [{
path: '/',
redirect: '/home'
},{
path: '/home',
component: Helloworld
},{
path: '/index',
component: indexs
},{
path: '/demo',
component: demo
}]
})
export default router
|
在vue的main.js
引入路由
1
2
3
4
5
6
7
8
9
10
| import { createApp } from 'vue'
import './style.css'
import App from './App.vue'
import router from './router'
const app = createApp(App)
app.use(router)
app.mount('#app')
|
完事了,路由的使用可以看这个的第三部分
https://yzhhhzy.github.io/2024/07/13/%E8%AE%A4%E8%AF%86Vue3/#more